



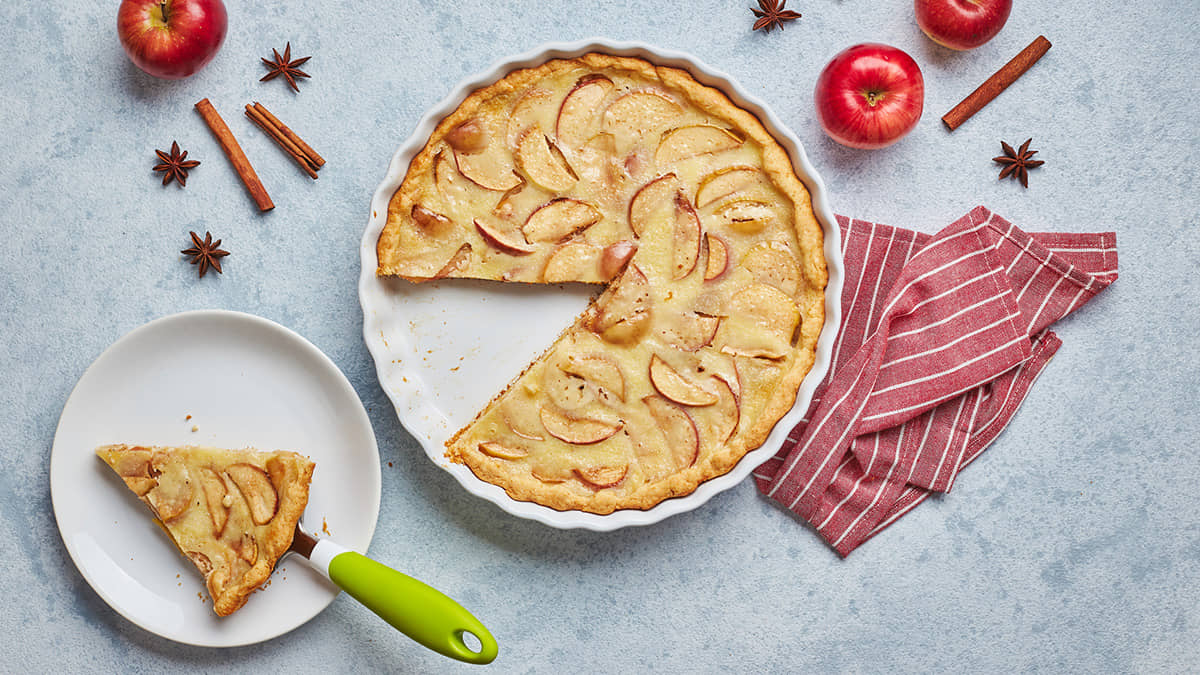
In this complete guide to baking with apples let’s start with a short summary first. For a pie or tart that holds its shape reach for Granny Smith, Honeycrisp, Braeburn, Pink Lady or Jonagold. Peel your fruit if you want the crowd pleasing version. Give your pie at least 4 hours to cool before you slice it. Freeze the filling raw instead of baked if you can. You can skip the lemon juice trick because a quick salt water soak keeps slices from browning a lot better.
That’s the whole cheat sheet. In my experience testing recipes for this blog, most of the confusion around picking good apples to bake with comes down to just a handful of details people never get taught. Once you understand the simple reason behind each one you’ll never need to look up a fruit baking tip again.
Why Do Some Varieties Turn to Mush While Others Hold Their Shape?
Picture a fresh apple as a tiny water balloon held together by a natural glue called pectin. Heat softens that glue and how fast it softens depends on 3 things. How much pectin the flesh has, how acidic it is and how much water it’s carrying.
Tart ‘n’ firm varieties hang onto their shape well. Soft sugary ones collapse. A study in the journal Agriculturae Conspectus Scientificus put numbers on this. Granny Smith measured 6.4kg per square cm on a firmness scale. A milder cultivar called Idared came in at just 4.5. That’s roughly 40% softer and it shows up exactly the way you’d guess once both are inside the oven.
Acid tells a similar story. Granny Smith carries about 0.69% malic acid, the tangy compound behind that sour bite. Idared only carries 0.45%. Did you know that extra tartness works almost like a natural firming agent? Which is part of why Granny Smith is famous for making your cheeks pucker and your pie slices stay neat.
We tested baking with apples using 6 different varieties in the same oven on the same day. We found the softer ones turned to sauce almost every time. These were the fruits worth grabbing:
Granny Smith, Honeycrisp, Braeburn, Pink Lady and Jonagold.
The ones worth skipping:
Red Delicious, McIntosh and regular Golden Delicious. All of which turn soft and a little bland once baked. If you’re in the UK you’ll find Bramley is your classic cooking variety. Though it behaves differently since it’s meant to break down into a soft fluffy filling rather than hold firm slices.
How Can You Tell If a Fruit Will Hold Up in the Oven?
Not sure which one in your fruit bowl will survive baking? Give it a gentle press first. If it dents easily under your thumb then it’ll likely turn to sauce once it’s in the oven. Take a small bite too. If it tastes sharp rather than purely sweet, there’s a good chance it carries the acid needed to hold together under heat.
To learn more about picking the right one for any bake including how to spot a good variety just by touch and taste, check out our guide on What Apples Are Best for Baking. We include a winning combination in there that’s one of our favourites to use when baking with apples that chef Gordon Ramsay also happens to love using too!
Should You Peel Your Fruit Before Baking?
This one comes down to taste on paper but real testing points in a clear direction. In a side by side comparison of 2 otherwise identical pies, one peeled and one left with the skin on, 17 out of 18 tasters in our case study picked the peeled version without hesitation.
The complaints about the unpeeled version were fairly consistent. The skin gets stuck in your teeth. It doesn’t break down the way the flesh does so you’re left with chewy little ribbons running through an otherwise soft filling. It can carry a faint bitter taste once it’s baked and concentrated too. Another issue was that it results in messy slices since a knife tends to drag rather than glide through it cleanly.
There’s a practical reason to peel too. Most store bought produce carries a food grade wax coating to help it last longer on the shelf. Leave the skin on and that coating, along with any residue sitting on the surface ends up in your filling unless you scrub every piece thoroughly first. That scrubbing step eats up close to the same amount of time peeling would have taken anyway.
Don’t toss those trimmings once you’ve peeled by the way. Soak them in a mix of one teaspoon of baking soda per cup of water for about 12 to 15 minutes to loosen up any residue. Then simmer them down with a splash of lemon juice, cinnamon and a bit of sugar. It turns kitchen scraps into a simple homemade sauce. This is one of my favourite ways to squeeze a second dessert out of a single bag of produce.
Want every detail behind that taste test including how different cultivars change your results? See our article on Should You Peel Apples For Pie.
Why Does Pie Filling Turn Out Runny?
A soupy pie is one of the most common complaints in home baking and it almost always comes down to 3 things.
1) You sliced it too soon.
2) You didn’t use enough thickener.
3) Or steam got trapped under the crust with nowhere to go.
Here’s the part that trips up most home bakers. A filling that looks runny straight out of the oven often isn’t broken at all, it just hasn’t set yet. Fresh fruit is roughly 85% water and as it bakes that liquid gets pulled out and mixed with the sugar and thickener. While the pie is still hot that mixture stays loose almost like syrup fresh off the stove. As it cools though the starch firms up and grabs onto the liquid.
In my own kitchen when baking with apples we’ve found that giving the pie at least four hours at room temperature before cutting into it makes all the difference. Overnight is even better and this is my preferred option. A filling that looked like soup at 3pm can slice cleanly by dinner with zero extra thickener needed.
Thickener choice matters too! A single batch of sliced fruit for one 9 inch pie can release nearly 1/2 a cup of liquid just from sitting with sugar before it even sees the oven. Here are the rough amounts for about 8 medium pieces of fruit:
All purpose flour: about a quarter cup, cheap but can leave the filling a little cloudy
Cornstarch: about 1 tablespoon plus 1 teaspoon, clear and glossy but weaker once frozen
Quick cooking tapioca: about 2 tablespoons, needs 15 to 30 minutes to soften first
Instant Clear Jel: about 1 tablespoon plus 1 teaspoon, holds up best through freezing and reheating
Don’t skip the vents in your top crust either. Steam has to escape somewhere and a few slits or a lattice top lets it out instead of turning back into liquid. No one likes a runny puddle at the bottom of their dish. We put slits into almost every apple dessert we make.
How Do You Fix a Filling That’s Already Runny?
Don’t worry it’s not a lost cause if the pie has already cooled and the middle still looks watery. Scoop out about half a cup of the loose liquid. Whisk it into a cornstarch slurry on the stove until it turns thick and glossy. Pour it back over the filling once it’s cooled a little then chill the pie for an hour or two to let everything set again.
We created a full step by step fix for this plus which pairings naturally release the least liquid when baking with apples. Check out Why Is My Apple Pie Filling Runny for an interesting read.
Can You Freeze Fruit Pie Filling Ahead of Time?
The good news is apple pie filling made from baked fruit freezes beautifully. Freezing it raw before it ever meets the oven gives you even better results than freezing a fully baked pie. A pie crust behaves a bit like a sponge, soaking up moisture the moment it touches wet filling. Bake it first and then freeze it and that soaking process runs for hours through cooling, freezing and thawing.
We tested this ourselves, freezing one batch raw and one already baked and the raw batch won on texture every single time. Freeze the filling on its own instead and the crust stays dry until it goes into a hot oven. This gives you a flakier bottom once it bakes.
Be sure to let the mixture cool completely before bagging it up. Warm filling trapped in a sealed bag creates steam and that steam turns into ice crystals that later melt into a watery mess. Push out as much air as you can, lay the bag flat to freeze then stack it once solid. A standard 9 inch pie needs about 4 cups of filling.
Thickener choice matters here too, maybe even more than it does for a same day bake. Cornstarch and flour set up nicely fresh but their starch structure breaks down through a freeze and thaw cycle. This leaves the filling thin and weepy later. Tapioca holds up far better and Instant Clear Jel is the more professional standard for anything headed for the freezer long term.
Do You Need to Thaw Frozen Filling Before Baking?
You don’t need to defrost an unbaked pie before it goes in the oven. Go straight from freezer to a 425°F oven for 15 to 20 minutes to set the crust quickly. Then drop the temperature to 375°F for another 40 to 50 minutes until the filling bubbles up through the vents. For the best flavour use frozen filling within about two months, though it stays safe to eat for quite a bit longer.
Full details on freezing a whole assembled pie versus just the filling can be found in our next article in this series Can You Freeze Apple Pie Filling.
What’s the Best Way to Stop Slices From Browning?
Lemon juice has been the go to fix for browning fruit for generations but it’s not actually the strongest option out there. Plenty of people also don’t love that tangy aftertaste sitting on top of something naturally sweet.
From our home case studies we find that a simple salt water bath works better. Stir half a teaspoon of table salt into a cup of cold water. Drop your slices in for 5 to 10 minutes then drain and rinse under cool water and pat dry. In our own kitchen testing untreated slices started browning within 15 minutes. While the salt soaked batch stayed bright for a full 12 hours at room temperature. That’s roughly 48 times longer.
The science checks out too. Slicing releases an enzyme that reacts with oxygen in the air and that reaction is what causes the browning. Salt contains chloride and chloride blocks that enzyme before the reaction even gets going. Rinsed properly, the fruit doesn’t taste salty either since the salt washes away along with the browning risk.
If salt isn’t handy then honey water comes in a close second, holding slices fresh for about 12 hours too. Just skip that particular trick for anything meant for babies under 1 year old since honey isn’t considered safe for little ones that young.
For the full comparison across 6 different browning fixes including citric acid and vitamin C powder see Keep Apple Slices From Browning Without Lemon Juice.
Which Variety Should You Use for Which Bake?
Not every cultivar is good for the same job. Matching the right one to the right recipe improves your results more than almost any other step.
Granny Smith is the reliable workhorse for pies and tarts. Its high acid and firm flesh mean it barely softens in the oven so slices come out looking almost identical to how they went in.
Honeycrisp was bred on purpose at the University of Minnesota back in the 1990s for the juiciest crunchiest bite possible. That same juiciness means it releases more liquid while baking. This makes it a natural fit for a crisp or crumble where extra moisture bubbling under a buttery topping is exactly the point.
Gala is sweet, mild and a little too soft to hold its own in a pie. Though it shines in muffins, quick breads and pancakes. In my experience working with pie fillings pairing a few Gala slices with Granny Smith can cut the added sugar by close to a third. While keeping the flavour well balanced too.
Fuji tests sweeter than almost any other variety on the shelf while staying firm enough to survive a good stretch in a hot oven. It’s a smart pick for cakes and low sugar bakes. Although it benefits from a splash of lemon juice or a tarter partner for added contrast.
What’s the Best Combo for a British Style Bake?
If you’re baking in the UK, a Bramley and Braeburn mix is definitely worth trying. We suggest roughly 60% Bramley to 40% Braeburn. It gives you that classic fluffy ‘n’ soft puree with just enough firm chunks running through it to keep some texture in every spoonful.
None of these cultivars beats the others across the board. Each one is simply the right tool for a specific job, the same way you’d reach for a different tool from a toolbox depending on what you’re building. For the full side by side breakdown head over to Apples For Baking Compared.
Putting It All Together
Baking with apples really comes down to a handful of small decisions. Pick a firm tart cultivar when shape matters. Peel if you want the version most people prefer. Give your filling time to set before slicing it. Choose your thickener with the freezer in mind if you’re making ahead. Skip the lemon in favour of a quick salt soak when prepping slices early.
Get those 5 things right and the difference between a pie that holds its shape and one that turns to soup basically disappears. Once you’ve spent a little time understanding what makes each variety behave the way it does, baking with apples stops feeling like guesswork and starts feeling like second nature. Whether you choose a classic pie, a rustic galette or a buttery crumble a firm well balanced fruit is what makes the whole dessert shine. I hope you will find this article series useful in your cooking adventures.
FAQ
Here’s a fun one for the next dinner table debate. Despite the phrase “as American as apple pie,” the dessert didn’t start in the States at all. The earliest known written recipe dates back to 1381 in England, penned by Geoffrey Chaucer himself. It normally called for figs, raisins and pears alongside the fruit with no added sugar at all.
Sugar was such a luxury item back then that it wasn’t widely available in London until decades later. Dutch and English settlers brought the tradition across the Atlantic in the 1600s and the first orchard in North America went in the ground in Boston in 1625. So next time someone claims baking with apples is a purely American pastime, you can share this story with them to set the record straight lol.
It depends on how soon you’re planning to use them. Fruit left out on the counter ripens a little faster and softens slightly. Which some people actually prefer for recipes where a mellower bite works well. Refrigeration is the better call if you want a crisper result or you’re working through a big bag over a few weeks. The crisper drawer controls humidity, and firm varieties like Fuji, Granny Smith and Pink Lady can hold their crunch in there for a month or longer.
We’ve tested both approaches in our own kitchen and the difference really only shows up once you get past the 1 week mark. If you’re baking within a few days of buying your produce the counter works perfectly well. Beyond that the fridge is worth the extra step.
It’s a small swap that changes more than people expect. White sugar lets the natural tartness and bright flavour of the fruit come through cleanly. Which is why it works well for a filling built around something sharp like Granny Smith. Brown sugar contains molasses which adds a deeper almost caramel like note that pairs beautifully with warm spices like cinnamon and nutmeg.
A lot of folks split the difference and use half of each giving you a filling that’s rounded in flavour without leaning too far in either direction. This is one of the techniques we like to use in our home bakes too. If your recipe calls for a spiced crumble topping rather than a plain filling, brown sugar is usually the stronger choice since it complements the toasty flavours already at play.
This one comes down to 3 natural pigments sitting in the skin. Chlorophyll gives fruit its green colour, carotenoids bring out yellow and orange tones and anthocyanins are responsible for red and crimson shades. Every piece of fruit actually starts out green since chlorophyll is present from the earliest stage of growth. As the season goes on though chlorophyll can fade while anthocyanins build up. Especially when cool nights follow warm sunny days.
That’s why an orchard can look noticeably redder after a stretch of crisp autumn evenings. It’s also a handy trick for picking fruit at the store. Green tends to signal a tarter bite, yellow usually means something milder while red can range anywhere from sweet to lightly tart depending on the variety.
Not structurally but they absolutely shape how the final bake tastes and smells. Cinnamon is the classic choice for a reason. It’s warmth pairs so well with almost every variety on this list. Nutmeg adds a deeper slightly earthy note in smaller amounts but it’s also much more potent than cinnamon so it can be easy to overdo.
A pinch of allspice or cardamom can round things out further if you want something that tastes a little more layered than a standard bake. We like adding a small pinch of fine sea salt to any spiced filling too since it sharpens the sweetness and keeps the spice blend from tasting flat. None of this changes how firm your filling holds together but it makes a massive difference in how memorable the finished dessert turns out.