Vish G
August 13, 2026
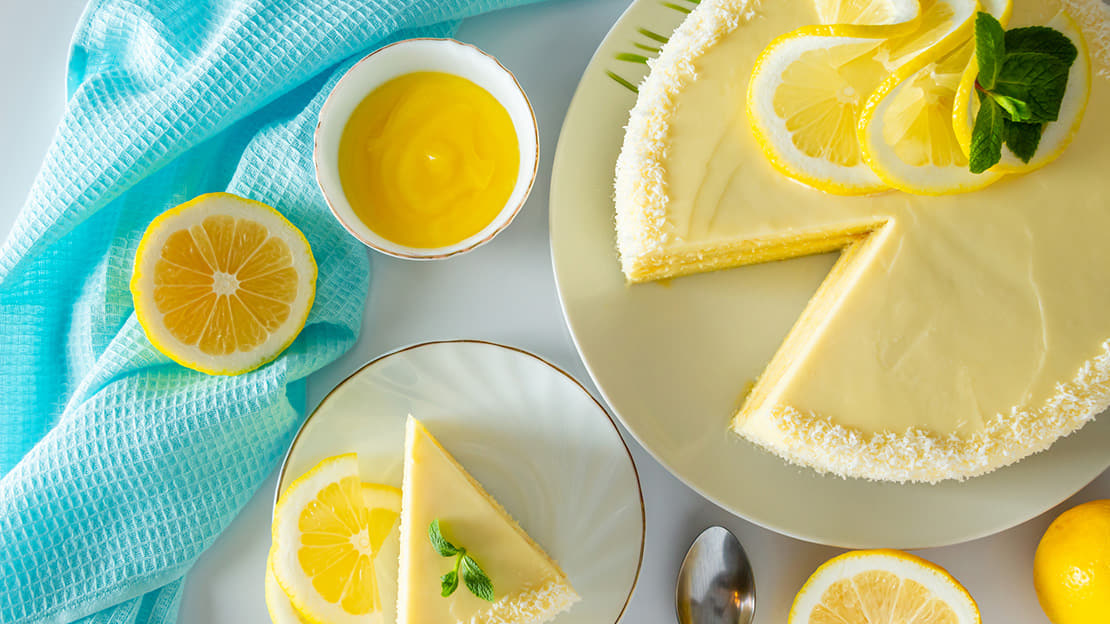
Our lemon and coconut cake will become your new summer favourite. An aesthetic looking dessert that will win your guests hearts from their very first bite. A soft fluffy sponge filled with a homemade lemon curd and topped with a white chocolate ganache that contains a flavourful secret. After many recipe tweaks and tests we got the coconutty flavour balanced just right so it fixes any sweet craving.
Pairing Suggestions
PREP TIME
75 MIN
COOK TIME
35 MIN
SERVINGS
10
The key is not adding lots of coconut to the sponge. Coconut can absorb moisture so this recipe keeps the sponge simple and uses butter, a little neutral oil and milk to give it a soft tender crumb. The biggest thing is to avoid overbaking it. Take the cake out when a skewer comes out clean or with a few moist crumbs rather than waiting until it is completely dry. Using room temperature ingredients also helps the batter mix evenly and gives you a lighter texture. Moist people commonly use coconut milk or other moisture rich ingredients while bakers frequently point to overbaking as a cause of dry cake.
Yes lemon curd makes an excellent cake filling and is particularly good with this combo because its sharp fresh flavour balances the sweetness of the cake and white chocolate. The important thing is to make the curd thick enough before assembling the cake. For this recipe the whipped cream ring around the edge acts as a barrier so the curd stays in the centre rather than being squeezed out when the second layer is placed on top. Lemon curd is widely used as a layer cake filling. This is a trick we learnt from experience after making the common mistake of having the inside filling leak out without using the "cream dam" technique when assembling everything.
Why not make this the day before to save you doing everything all in one day? Cook the curd gently until it is thick enough to coat the back of a spoon then strain it and chill it completely. It will become noticeably thicker as it cools. Don't try to make it extremely thick while it is still on the heat because that increases the chance of overcooking the eggs and ending up with a lumpy curd.
For this cake the combination of whole eggs, egg yolks and butter gives the curd enough body to sit comfortably between the layers. Keeping the lemon juice to the amount needed for a properly thick curd also helps prevent a loose filling. Straining the finished curd removes any tiny pieces of cooked egg and gives you the smooth texture you want in a layer cake. Try not to skip this step as it makes a difference to your end result.
Since this dessert contains homemade lemon curd and whipped cream keep it refrigerated and ideally eat it within about 3 to 4 days for the best texture and flavour. Keep it covered properly so the sponge doesn't absorb other smells from the fridge.
If you are making it ahead you can prepare the lemon curd separately in advance and keep it refrigerated then assemble the cake closer to serving (this is what we prefer to do to save time). Lemon curd itself generally keeps well when refrigerated in a sealed container, although exact storage time depends on the recipe and handling. King Arthur Baking specifically recommends refrigeration for cakes containing lemon curd and gives five days as a maximum example for a similar layer cake.
White chocolate ganache is particularly sensitive to the amount of liquid used because white chocolate behaves differently from dark chocolate. A higher proportion of white chocolate gives you a firmer ganache while extra cream or coconut cream makes it softer.
For this cake use the thick part of the coconut cream and leave the watery liquid behind. The recipe uses 200 g white chocolate to 70 g coconut cream which gives you a firm topping that can be spread over the cake once cooled. Similar white chocolate ganache recipes commonly use around a 3:1 chocolate to cream ratio when a firm cake topping is required.
The temperature when you apply it matters too. If it is still warm and runny it can soften the cream underneath. If it has become very cold and stiff it can drag across the cake instead of spreading smoothly. Let it cool until it has the consistency of a soft chocolate spread then apply it to the chilled cake.
Absolutely and this is actually a good dessert to prepare ahead because several parts benefit from chilling. The curd can be made first and refrigerated until completely cold which makes it much easier to use as a filling. You can also bake the sponge earlier in the day and let it cool completely before assembling.
For the best result assemble the cake once the curd is cold, add the cream barrier and then chill the assembled cake before applying the white chocolate topping. The finished cake can then be refrigerated until the ganache has set. Taking it out around 15 to 20 minutes before serving gives the sponge and topping a little time to soften while keeping the filling nicely contained. Cakes with lemon curd fillings are generally well suited to refrigeration and cake layers themselves can also be prepared ahead and frozen if needed.
Nutrition Facts
Calories
601
Total Fats
39.5 g
Saturated Fats
23.5 g
Cholesterol
177 mg
Sodium
75 mg
Total Carbohydrates
54.6 g
Sugars
39.8 g
Protein
8.5 g





Search our tested recipe collection!
From weeknight staples to show stopping desserts, all tried and re-tested.
How Did It Turn Out?
4.8 / 5. Vote count: 95
No votes so far! Be the first to rate this post.