



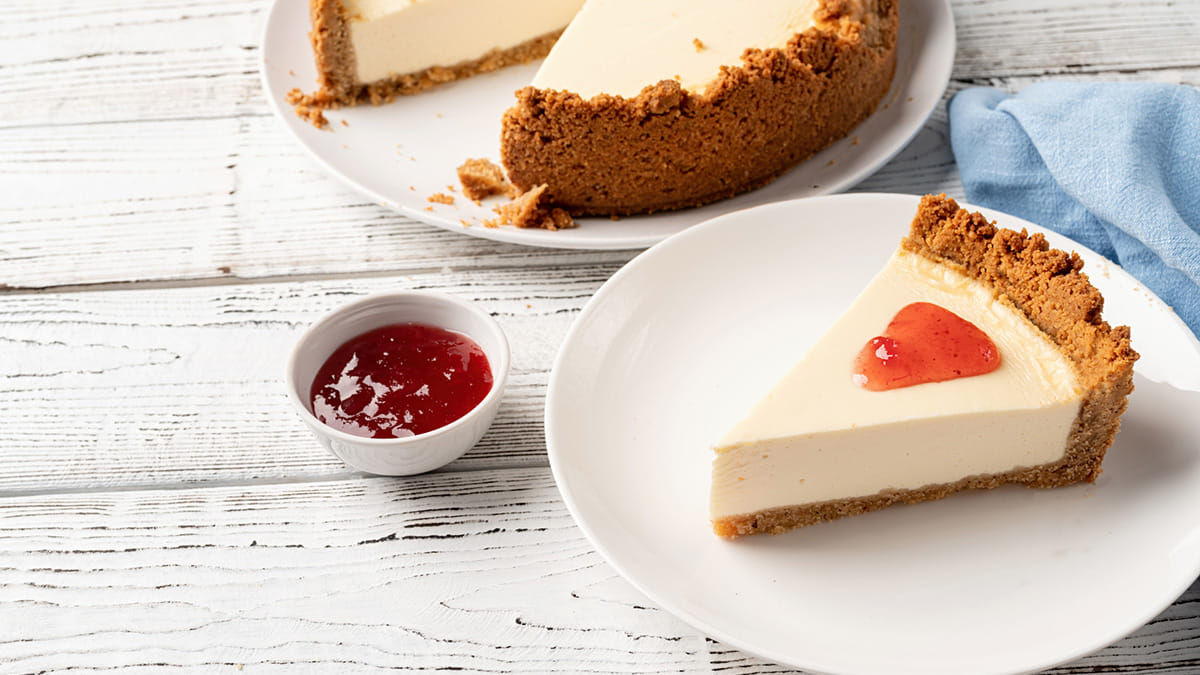
A graham cracker crust falls apart when it doesn’t have enough melted butter, evenly crushed crumbs or chilling time to hold everything together. The fix is simple. Use around 5 to 6 tablespoons of melted butter for every 1.5 cups of crumbs, press it in firmly and give it at least 30 minutes to chill before you cut into it.
You slice into your cheesecake ready for that clean satisfying cut. Instead the bottom caves in and you’re left scooping up crumbs with a spoon.
Here’s the short answer. Your biscuit base is almost always falling apart for one of three reasons. Not enough butter, crumbs that are too coarse or not enough time to chill before you cut into it. This is especially common with a no bake cheesecake since there’s no oven step to help lock everything into place. Fix those 3 things and your crust problems are usually solved for good.
Let’s look at why each one matters because once you understand the reasons your biscuit base keeps crumbling you’ll never deal with it again.
What Actually Holds a Graham Cracker Crust Together?
A lot of people assume butter is only there for flavour. It’s actually doing a much bigger job in the bottom.
When you melt butter and stir it into the crumbs the fat coats every piece. As the mixture cools that fat hardens again and locks the crumbs in place. According to research from the FoodMASTER curriculum a food science program developed with East Carolina University and supported by the National Institutes of Health, butter melts around 90 to 95°F which is basically the temperature of a hot bath. Once it cools back down to somewhere around 60 to 65°F, roughly like a mild spring afternoon it hardens right back up and takes your crumbs with it.
Butterfat “congeals to further strengthen the crust structure” as the mixture cools. In plain English, your crust needs to properly cool down before it can hold together whether it’s baked or left as a no bake cheesecake crust in the fridge.
How Much Butter Does a Graham Cracker Crust Actually Need?
If you skimp on butter there isn’t enough hardened fat to bind the crumbs. The biscuits might look fine going into the pan then falls apart the moment a fork touches it.
For example in a standard 9 inch springform pan you want about 1.5 cups of crumbs to 5 or 6 tablespoons of melted butter, plus 2 to 3 tablespoons of sugar. Too little butter and the crust turns dry and sandy. Too much and it can turn greasy and just as prone to falling apart since excess fat weakens the same structure it’s supposed to build.
Why not use the squeeze test? For example grab a handful of the mixture and squeeze. If it holds its shape then your ratio is right. If your mixture won’t clump together when you press it between two fingers, add another tablespoon of melted butter at a time until it does.
Does Crumb Size Really Change How Well a Crust Holds Together?
In our own experience yes and this step gets overlooked more than any other. If your graham cracker crumbs are uneven with a mix of fine dust and larger chunks the bottom will never pack tightly. Large pieces such as chunks bigger than a grain of rice create weak spots that break apart when you slice the cake.
The fix is simple though. Crush your crackers in a food processor until they resemble wet sand or seal them in a bag and go over them with a rolling pin. You want one even fine texture throughout with no chunky bits left behind. This golden rule applies whether you’re using traditional graham crackers, chocolate wafer cookies or digestive biscuits which is the go to substitute for readers in the UK.
This was one of the classic rookie mistakes that we made too when we were learning how to make our desserts better. We started with the rolling pin over a bag method until we found that up to 30 seconds in a food processor gave us more finer crushed biscuits. Woohoo!
If digestive biscuits are your substitute of choice about 12 of them will get you close to 170 grams of crumbs. Which swaps in for graham crackers almost one for one.
How Do You Press a Crust So It Doesn’t Crumble?
This step gets rushed constantly by newbies. A light sprinkle and pat job simply won’t cut it for a graham cracker crust.
Our personal favourite method is to press the biscuit mixture down firmly using the flat bottom of a straight sided glass or measuring cup. Push hard enough that the crust feels compact rather than just loosely covered. Don’t forget the sides of the pan if your recipe calls for them since a base that’s thick on the bottom but thin around the edges tends to crack right where the two sections meet. Something we learnt later on in our foodie adventures.
How Long Should a No Bake Cheesecake Crust Chill Before You Fill It?
This is where most home bakers get impatient. Once your biscuit base is pressed into the pan, it needs time in the fridge or ideally 10 to 15 minutes in the freezer before any filling goes on top.
That extra chilling time gives the butter a chance to firm back up and do its job as the glue holding the bottom together. If you’re short on time the freezer works fastest and won’t change the texture. Baked cheesecake recipes usually call for baking the crust at 350°F for 8 to 10 minutes instead which achieves the same result using heat rather than cold.
Either way resist the urge to slice too soon! Cutting into the bottom before it’s fully set is one of the most common reasons it crumbles even when everything else was done correctly.
Our Kitchen Example
I once made a cheesecake for a family event during a summer heatwave. Everything seemed fine until I noticed my melted butter looked thinner than usual because my kitchen was so warm, oops! The digestive biscuit bottom looked normal going into the pan but then turned out loose and sandy once sliced. A dessert disaster that nobody wants.
The lesson here is that room temperature and even your butter’s condition can shift how much you actually need. If your kitchen tends to run warm, whether you’re in a hot southern state in the US or dealing with a rare sticky UK summer you may need slightly more butter and a longer chill time to compensate.
Quick Checklist If Your Crust Keeps Falling Apart
1) Add more melted butter, a tablespoon at a time until the mixture clumps when pressed
2) Crush your graham crackers until they’re fine and even, with no chunky bits left
3) Press the crust down firmly with a flat bottomed cup or glass, including the sides
4) Chill for at least 30 minutes or freeze for 10 to 15 minutes before adding filling
5) Never slice a no bake cheesecake crust until it has fully set
Is Your Crust Fixed But the Filling Still a Problem?
Sometimes a crumbly base is only part of the picture especially if the whole cheesecake seems soft or won’t hold its shape after chilling. If that sounds familiar the crust likely isn’t your only issue. Our full guide on why your no bake cheesecake didn’t set walks through every other possible cause from gelatin ratios to fridge temperature.
Put Your New Crust Skills to Work
Once you’ve got the technique down a firm graham cracker crust becomes the foundation for almost any cheesecake you want to make. It’s exactly what you need under a classic New York style cheesecake where the dense tangy filling deserves a base that won’t fall apart underneath it.
If you’re after something more seasonal the same method works beautifully in our pumpkin cheesecake swirl pie where a sturdy bottom makes all the difference when slicing clean wedges for a crowd of hungry guests.
A dependable graham cracker crust really comes down to three things. Enough butter, evenly crushed crumbs and patience while it chills. Get those right whether you’re building a baked base or a no bake cheesecake crust and you’ll never deal with a crumbly bottom again.